
I raised my first batch of chicks in the dead of winter, and looking back, it was not one of my best ideas. I’m sure that early season chicks are a phenomenal option for those living in more temperate climates, but in eastern Washington, we get a lot of snow for far too long. Though our winter chicks did bring my young kiddos a lot of joy (and welcome distraction) during our coldest days, those chicks lived in my laundry room for weeks until the temperatures were warm enough to transfer them to the garage. Once they moved outside, I worried about them constantly. I also still had to wrangle them back into the garage for quite awhile before they were feathered enough to face nights out in the coop without heat. I learned a lot while raising my first chicks, and one of the top lessons was that brooding chicks in the cold is just not for me. I decided to try brooding our backyard chicks in the summer this season, and it was such an easy and enjoyable experience for our entire family.

This year, I opted to get our chicks after Memorial Day weekend, which is when the good weather typically kicks in and stays consistent over here. Because I am a fan of both a colorful flock and a rainbow basket, McMurray Hatchery sent us a variety of new gals for our backyard. I chose two Bielefelders (named Sunny and Scramble) because I have heard over and over how great they are in a backyard setting, and their friendly, calm dispositions are great for young kids. We got a Red Star (Cinnamon Roll) and a Whiting True Green (Gravy) for similar reasons, and because I like to mix in a few production breeds here and there to get us through the winter months. I also chose a Silver Laced Wyandotte, affectionately named Triceratops by my son, because I simply cannot resist how beautiful they are, and they are really well suited to our climate. I loved being able to get a mix of breeds to add to our colorful backyard flock!
My Favorite Brooding Equipment
Here are a few of my favorite items to have on hand when brooding backyard chicks:
- Large plastic tote: These are easy to find at most home goods and hardware stores for a decent price. I prefer clear totes so that the chicks can see what is happening around them.
- Basic feeder and waterer: I like to have this feeder/waterer set on hand for the first few weeks. These are easy to clean, easy for the chicks to figure out, and can be sanitized and stored for future broodings.
- Brinsea EcoGlow Brooder: I absolutely love my EcoGlow. Because I brood chicks in my house for the first few weeks, using a brooder plate puts my mind at ease, as it does not pose the same type of fire hazard as a heat lamp.
- Rent A Coop Small Cage Waterer: Around 2-3 weeks of age, I like to transition my chicks over to this kind of waterer. I prefer the horizontal nipples that it comes with because they completely eliminate the icky water factor that comes along with brooding chicks. If your chicks aren’t catching on to the nipples, or if you just want to use a different option, this style of waterer also comes with cup attachments.
- Rent A Coop Small Cage Feeder: Unfortunately, the availability of this style of feeder is hit or miss. I recommend checking online for it every week or so while you wait for your chicks to arrive. A basic feeder placed on top of an upturned bowl or brick will help keep things clean as chicks age, but this type of feeder really keeps the feed and brooder clean for much longer if you can find it. This style from Rent A Coop offers a similar idea, but has a much larger footprint.
- EcoFlex coop and run attachment: This year, I decided to invest in a brooder coop and run, knowing we would use them year after year. This set was an amazing choice! I was able to use it in so many ways…from using the run as a free standing portable enclosure, to using both as an integration brooder in my big coop, I used both of these until my chicks fully transitioned into the big coop.
- Feed: I like to stock up on both starter and grower feed before my chicks arrive. The amount you will need will depend on how many chicks you get, but having one or two bags of each type of feed on hand will buy you time to get more if you find yourself running low.
- Grit: When my chicks started spending more and more time outside, I made sure to keep a small dish of chick-sized grit available to them at all times to aid in digestion.

Before Arrival
I like to give my local post office a phone call a day or two before I expect a shipment of baby poultry. I typically leave my name and number (even though they are already on file), ask that I be contacted as soon as humanly possible, and thank them for their care and attention in helping us get our chicks home.
A day or two before I expect my chicks, I get the brooder ready. As I mentioned, I like to start my chicks out in a large plastic storage tote with a thick layer of paper towels on the floor. For the first two or three days, I find that paper towels are a bit easier to clean up than wood shavings. I also like to set up their food and water containers, which I fill right before heading out to the post office. Finally, I always set up my Brinsea brooder plate the night before my chicks are supposed to arrive to make sure that it is in working order. Because chick pickup is always early in the morning, this means my brooder is nice and warm before I hit the road to pick up our girls.
The Chicks are Here!
There are few things I love more than picking chicks up from the post office. I love the cool, crisp early morning air, a hot coffee in my hand, and the quiet of my car (because I always get to go alone.) It is the ultimate mini-vacation as a mom of small kids, in my opinion. While my post office is usually really good about calling me as soon as the chicks are able to be picked up, I have been known to show up without getting a call first. Once the chicks are in my car, I like to look them over really quick before heading home.
This time around, my toddlers were eagerly waiting for me when I pulled into the driveway with our newest round of McMurray chicks. My tiny helpers gently held every chick before passing them to me, watching closely as I dipped each beak in warm water. After making sure all of our chicks were drinking well (a tip I learned from Gail Damerow in our new expert article about tips for raising chicks), I put Gel Start PRO (formerly called GroGel) on their food, and added it to the brooder. Per Tom Watkins’ instructions in the same article, I tried to keep the food easy to find by only setting out the small base of my feeder so that their access wasn’t obstructed by the feed jar, which I introduced a few days later.

The Great Outdoors
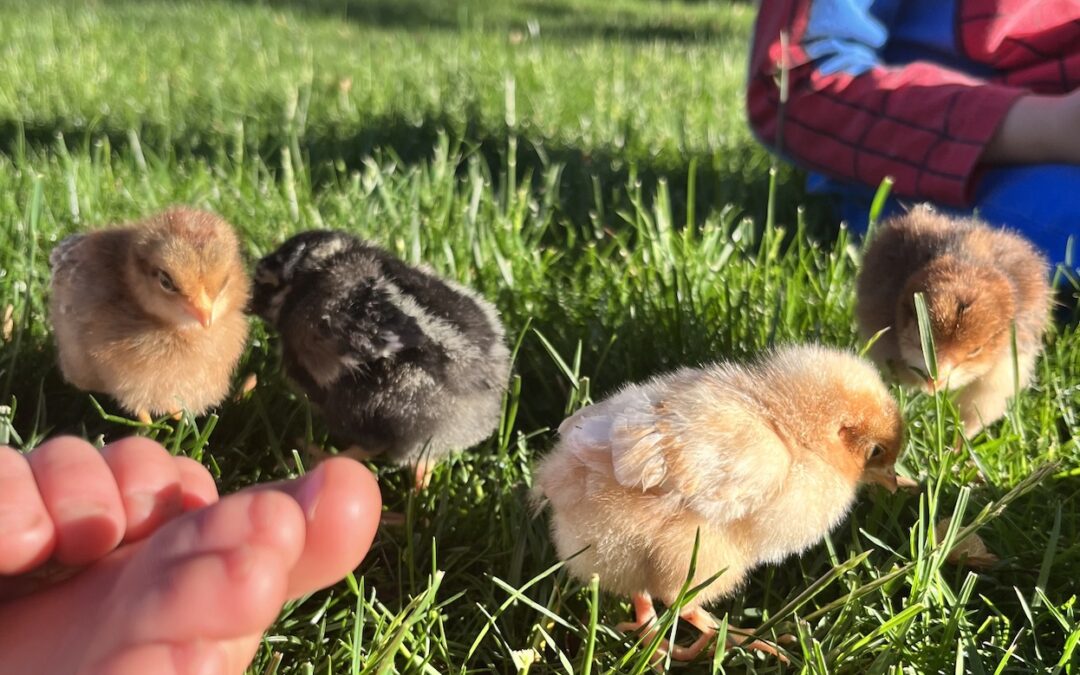
Because our climate is very warm and dry this time of year, we were able to introduce our chicks to grass quite early on. My kids and I brought them outside at least twice a day while they were still in their indoor brooder. While outside, we paid close attention to their sounds and body language. Overly loud peeping and huddling together meant it was time to head inside back to the comfort of the brooder. As time went on, our field trips lengthened, which let me know the chicks were likely ready to move out of their full-time indoor brooder.
Brooder Graduation
By the time our chicks were about a week and a half old, the outdoor temperature matched (and sometimes exceeded) the recommended ambient temperature for brooding chicks their age. I set up our EcoFlex run so that it could stand alone fully enclosed. Each morning, we brought the chicks out to it so that they could enjoy grass, sunshine, and fresh air. Throughout the day, I monitored the chicks very closely to make sure they had access to both sun and shade. We also checked frequently to make sure they had fresh feed and water as needed. I poked my head out periodically so that I could hear their little peeps, which helped me gauge their level of comfort easily. During this phase, our chicks remained in their outdoor brooder only when we were home and were able to easily keep tabs on them. We brought them back to their indoor brooder each day during my kids’ nap, anytime we left the house to run errands, and at night. Moving outside quickly (and safely) was far and away the best part about brooding backyard chicks in the summer. I loved this setup because it was less brooder mess for me to clean, and I positioned the enclosure so that I could see it from several windows in the house. I just love looking out to happy backyard chicks while I do dishes!

Feeder and Waterer Upgrade
When our chicks began using their outdoor brooder during the day, I also introduced them to the Rent A Coop chick feeder and waterer. Because these are a bit different from the equipment my chicks started out with, I went through the process of introducing each chick to the new feeder, and pressed each beak to the horizontal nipple waterer, too. My kids and I sat with the chicks for a while to make sure that we saw each one use the feeder and waterer independently several times before I was satisfied that they were eating and drinking well. Overall, the transition was very smooth, and switching to the new feeder and waterer meant everything was much cleaner moving forward.
Other Major Milestones
When our girls turned three weeks old, it was warm enough for them to be fully outside. I sweet talked my sister into helping me finish building my EcoFlex coop, which we attached to their existing run. For the first week or two that the chicks were outside, I kept their Brinsea plugged in at night, and also monitored our weather very, very closely. I took the Brinsea out of their little coop by the time they turned five weeks old, and they were perfectly comfortable without it thanks to our warm and dry summer weather…yet another perk to brooding backyard chicks in the summer!
When I set their outdoor coop up, I made sure to do several very important things. First, I blocked their access to the nesting box to ensure they didn’t form a habit of sleeping in that part of the coop. Once they stopped sleeping under the Brinsea at night, I also checked to make sure they were settled on their little roosting bars. If anyone tried to sleep on the floor bedding at night, I would gently place them on the roosting bars to help encourage them to roost at night. They caught on to their bedtime routine very quickly!
Finally, the most important thing that I did was to set up the chicks’ outdoor brooder coop in close proximity to our existing coop and run. This allowed our big girls to observe the babies for several weeks before we integrated the two flocks. I kept the big girls away from the chicks’ coop for about a week. Then, I slowly began my master plan for introducing them all. Next, using a puppy gate, I set up a small enclosure around the chicks’ coop, and opened their door to allow them to range a bit closer in proximity to the big girls, while still making sure they had a physical barrier. After another week of this, I let them all free range together for supervised visitations throughout the day. I followed that protocol for about a week, and by then, everyone was just fine together. I am very lucky to have a gentle flock, with many hens who enjoy being mothers and raising babies. Everyone’s flock has a different dynamic that will play into how long the integration period will take.
Moving to the Big Coop
Even though our chicks were fully integrated into our existing flock by seven weeks, it took a bit longer to convince them to sleep in our big coop. For a while, I had to get them out of their own coop, carry them to the big coop, and place them on the roosting bars inside each night. After a few nights of that routine, I blocked off their access to their old coop, and they began using the big coop with no issues.
Raising summer chicks was such a fun experience for our family, and we can’t wait to do it again next year. I will definitely choose to brood my backyard chicks in the summer more often than not. Blue skies, sunshine, and baby chicks…it doesn’t get much better than that for me!


Cassidy Cornell is a mama, homemaker, and backyard poultry enthusiast living in Eastern Washington. She loves gardening, baking, and taking pictures of eggs.
All photos in this article are courtesy of Cassidy Cornell.