
Are you interested in knowing more about how to brood and raise turkey poults? If you are interested in raising turkeys on your homestead or farm, you will want to know the best tips for raising strong, healthy poults. Turkeys can be both a sustainable meat solution for your family, and enjoyable members of your poultry flock. Quite a few people end up quite attached to their pet turkeys!
There are three ways to obtain turkey hatchlings, called poults. The first pertains to Heritage turkeys: allow a Heritage hen to follow her instincts and set a clutch of eggs to hatch your poults. Another option is incubating fertilized turkey eggs under specific conditions. Finally, you can opt to purchase poults from a reputable hatchery. This gives you a good number of poults and allows you to try a few different varieties at the same time.

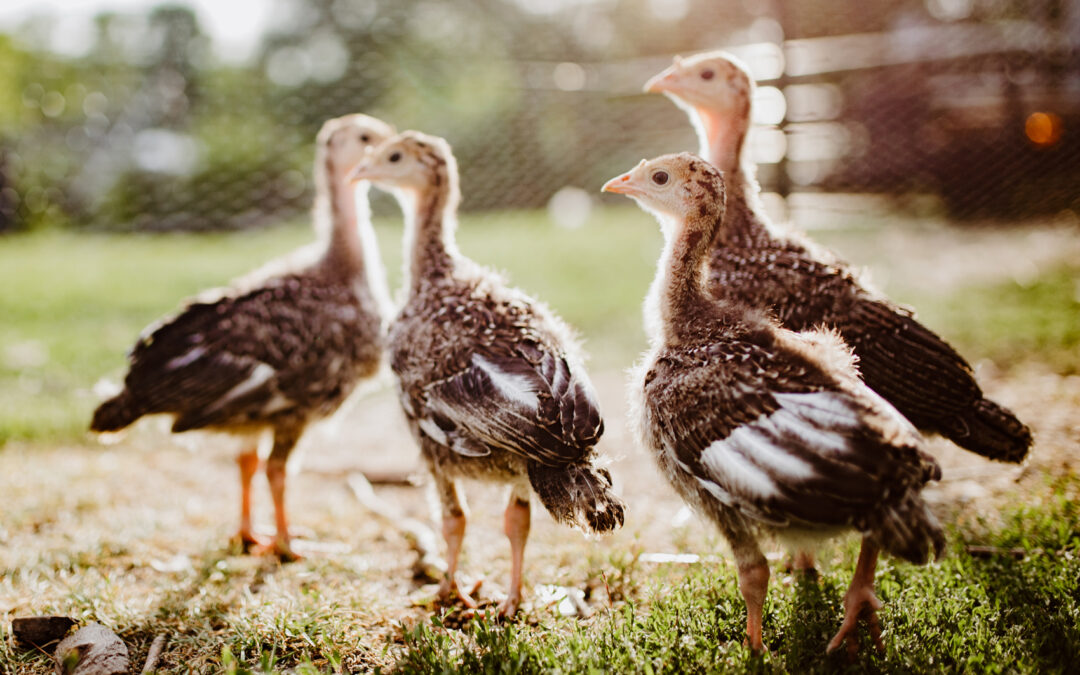
Photo courtesy of Stacy Benjamin of 5R Farm Oregon.
Naturally Brooding Poults by Heritage Turkey Hens
If you are keeping a Heritage turkey hen and tom, you most likely have fertilized eggs. Heritage turkey varieties such as the Narragansett, Bourbon Red, and Blue Slate are able to mate naturally. The resulting fertilized eggs are more likely to be brooded by the hen successfully.
Production turkeys, such as the Broad Breasted White or Bronze, are too large to mate successfully. These varieties are often artificially inseminated, and therefore do not make good candidates for natural reproduction on homesteads. Additionally, most production hens do not instinctively sit on their eggs as Heritage hens typically do.
Turkey hens are seasonal egg layers. Once you begin to find eggs in the spring, prepare an area where your hen will be safe as she sets on the eggs. Collect any eggs in good clean condition from your hens. While some people choose to leave brooding to nature, allowing multiple hens to brood will often result in the loss of all the fertilized eggs. The best course of action is to choose your calmest and most settled broody, set up her safe space, and allow her to brood the clutch of eggs alone. Once you feel that the broody hen is ready to settle, you can slip any other eggs that you have collected from other hens into her nest.
Notes from an Expert
 Stacy Benjamin of 5R Farm Oregon has been raising Heritage turkeys for years. She allows her hens to brood naturally. Her advice is to only have one hen brooding in a small coop at a time. During one brooding, two of her hens set quite well for the majority of the 28 days. Toward the end they became restless, jeopardizing the entire clutch of eggs. Since watching this scenario play out, Benjamin has chosen to brood one hen at a time. In addition, she uses a removable fence to keep the broody hen near the coop for food and bathroom breaks. The fence helps to eliminate the risk of another turkey entering the coop and disrupting the hatch.
Taking Care of Your Broody Turkey Hen
Turkey poults normally hatch at 28 days. Within a few days of hatch, the hen may refuse to leave the nest. You can try placing a small dish of water and food near her, removing them periodically so the water doesn’t spill into the nest. The hen may not appreciate the gesture, so wear gloves to protect your hands!
You should also be sure to provide the hen with enough bedding to make a thick nest. Benjamin also notes that her hens seem to move the bedding aside and end up laying on the floor of the coop. This isn’t ideal, and can lead to eggs breaking. While her broody hen is out eating, she sneaks additional bedding into the nest to keep the eggs nestled in the softer bedding.

Photo courtesy of Stacy Benjamin of 5R Farm Oregon.
Using an Incubator to Brood Fertile Turkey Eggs
If you have fertile turkey eggs and an incubator, it is possible to hatch poults inside. Water fowl and turkeys are notoriously more challenging to hatch in an incubator than chicks, but if you maintain the correct conditions, you will experience successful results.
The first item you will need are the fertile eggs. You can collect the eggs yourself if none of your hens are inclined to brood, save them for a week or two, and place them in the incubator. The eggs collected should be clean (but do not wash them!), normal size, and free of visual defects.
In addition to the incubator, you will need a temperature thermometer, a wet bulb or humidity thermometer, and a spray bottle for misting to increase humidity. Many modern incubators include thermometers and electronic settings for monitoring days to hatch and turning of eggs.
Turkey eggs need to be turned four times a day until the last four days of incubation. If you don’t have an incubator that does egg turning, you will need to do this manually. Work quickly while turning to reduce the time the incubator is open and losing heat and humidity.
Once a week egg candling is an important step in checking on growth and development in the eggs. Candling eggs is the practice of shining a bright light against the shell to view embryo development. If development stops or doesn’t begin at all, those eggs need to be removed from the incubator. Leaving them in the incubator can cause them to explode and contaminate the other developing eggs. Egg candling lights are available through poultry supply retailers, or you can try to use a small LED flashlight.
The incubator temperature needs to be consistently maintained in the range of 99.5 to 101 degrees Fahrenheit. The humidity for hatching turkey poults should be 50 to 55%. Proper humidity levels are a key factor in successful hatches.
Important Notes on Incubating Turkey Eggs
- Collect or purchase fertilized turkey eggs in good condition. Turkeys are seasonal layers so your collection window is from March to mid-summer.
- Obtain an incubator large enough to accommodate turkey eggs, with the appropriate turning tray if you are using an automatic egg turner.
- Gather a candling light for development checks.
- Use thermometers for monitoring temperature and humidity if the incubator does not have these.
- Make sure you are incubating during a time period where you can monitor the eggs for 28 days, plus time to have the poults transferred to the brooder.

Photo courtesy of Jerry Broyill.
Purchasing Poults from a Hatchery
A third way to raise your own poults is to purchase them from a reputable hatchery. Ordering poults is a good way to jump start your turkey flock and have a mixed flock of different breeds.
The poults will arrive at just a few days of age, and will be quite vulnerable. The first key to success is making sure that your brooder is warm and ready for the poults the moment they arrive. The temperature inside the brooder should be 98 to 99 degrees Fahrenheit in the beginning. You will lower the temperature each week by 5 degrees. This is easily done by raising the heat lamp or brooder plate slightly.
Food and warm water should be placed in the brooder near the edges of the heated area. Don’t place them directly under the center of the lamp. The poults need to access food and water without getting chilled or being overheated. Turkey poults may not take to the food and water like chicks do.
Notes from an Expert
 Ann Accetta-Scott raises turkeys on her homestead, Acorn Creek Farmstead. Ann recommends that you mimic things the turkey hen would do for her hatch. Keeping a small area for the first week helps the poults stay warm. You can also tap the water dish and the food to call the poults attention to them. This mimics what the hen would do in natural brooding.
Basic Brooding Practices
FEEDING YOUR POULTS
Initially, the protein requirement of freshly hatched poults is quite high. Using a game bird feed will meet their 28% protein requirement. After the first 6 to 8 weeks, the food can be changed to a 20% protein feed. After 24 weeks of age, the poults can be fed a mixed poultry feed. In addition, supply grit in a free choice feeder to ensure good crop health. Once the poults reach the point of lay the following spring, add ANOTHER free choice feeder with a calcium supplement, such as oyster shell, to the coop for sturdy egg shells.
BROODER CLEANLINESS
Clean the brooder often to reduce the chance of disease. The first cleaning can often wait a week after receiving the poults. However, as the poults get larger, brooder cleanings will need to be more frequent. As they grow, you may need to clean every day or two.
MAINTAINING TEMPERATURE
It’s important to keep the poults from getting chilled. If you find one has become cold, warm it immediately. Once the bird is no longer cold, encourage it to eat and drink again before releasing it back into the brooder.
Incorporating Turkeys into Your Flock
The easiest way to incorporate turkey poults is to do so gradually. The general recommendation is to not keep turkeys with chickens due to Blackhead disease (Histomonas meleagridis). Chickens can carry this disease and are more resistant to illness to it. Turkeys often succumb to Blackhead disease.
I attempted to house turkeys with ducks, but after a few days, both species became territorial and started fighting each other. This is just my experience and may not be how your attempt turns out. It is good to know that you should always watch out for aggression when integrating turkeys into an existing flock of any species.
Successfully raising turkeys for your homestead is a great way to raise a sustainable meat supply. Heritage breed turkeys also make entertaining pets and many have wonderful personalities. They are impressive birds for any poultry yard.

Janet Garman of Timber Creek Farm is an author, fiber artist, and farmer with a love for animals and sustainable living. Janet has a degree in large animal farm management and animal science from the University of Maryland, and helps others learn to raise livestock, chickens, ducks, rabbits, and manage a small farm. Her articles on keeping animals, small farms, and homesteading can be found on many popular websites. Janet is the author 50 Do-it-Yourself Projects for Keeping Chickens, Chickens from Scratch and many books about fiber arts and farming with animals.
Photos courtesy of Stacy Benjamin of 5R Farm Oregon and Jerry Broyhill.